
For 3 weeks I made animated portraits of Bach on Pico-8, to go along with @Gruber_music‘s Pico-8 recreation of Bach compositions. There’s a total of 15 portraits and for each one I wrote a short post about one or multiple of the effects I used in it!
This is the first part of the regroupement of these short write-ups!
Super big thanks to all my Patreon supporters without whom I certainly wouldn’t have been able to work on this project at all. Here are the names of all the 3$+ supporters:
Joseph White, Jefff , Riccardo Straccia, HERVAN , Andreas Bretteville, Bitzawolf , Alan Oliver, Paul Nguyen, Dan Lewis, Christian Östman, Dan Rees-Jones, Reza Esmaili, Thomas Wright, Chris McCluskey, Joel Jorgensen, Marty Kovach, Cole Smith, Giles Graham, Tim and Alexandra Swast, Sasha Bilton, berkfrei , Jearl , Dave Hoffman, Finn Ellis, David Dresbach, Egor Dorichev, Jakub Wasilewski, amaris , Brent Werness, Anne Le Clech, Jesse Bergerstock, Jacel the Thing, Pierre B., nanoplink , Sean S. LeBlanc, C Oakreef, Andrew Reist, vaporstack
With special thanks to Ryan Malm for supporting me at the 16$+ tier, and for such a long time too!
All the source files for these Bach portraits are available to download to all my 5$+ supporters, on this post!
For this first of 15 days of Bach portraits, let’s talk about how I’m rendering Bach’s face!
First things first, we need some reference data! So let’s snatch a portrait of Bach off Google Pictures and cut out the face and hair.
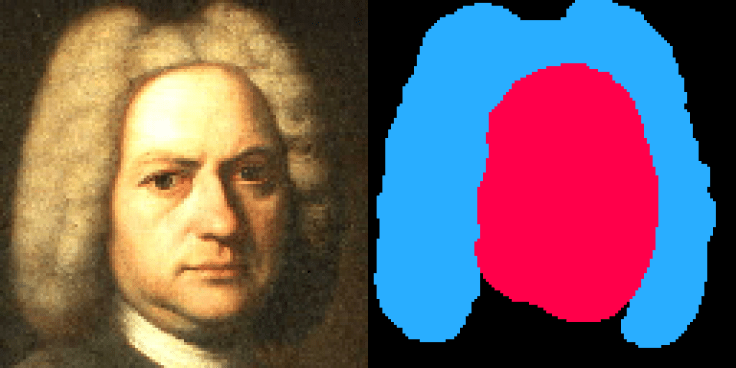
Now import that cutout in Pico-8 and write a tiny program that will generate a long string that registers the shapes’ borders on each line of the screen. The string takes the form of a lua table initialization and it is exported with printh(str,”@clip”), directly to the clipboard! Here’s a short excerpt of what it looks like:
face_cutout={[22]={67,75},[23]={62,76},[24]={59,79},[25]={57,83},[26]={55,84},[27]={53,84},[28]={51,85},[29]={50,87},[30]={50,88},....}
Pico-8 makes a great scripting tool when you want to format or generate formatted data strings like this!
From there, we can use these few lines to render the shapes:
for y,xs in pairs(face_cutout) do
 local i=1
 while i<#v do
  local xa,xb=xs[i],xs[i+1]
  rectfill(xa,y,xb,y,15)
  i+=2
 end
end
And that will give you an amazing feature-less wax reproduction of Bach’s face! So now the features!
I just love how that looks.
Yes, the features are simply sprites made as close as I could to the original portrait I showed you above. Now I only have to draw them at the right coordinates and we have our Bach portrait!
But of course that’s not it! In this first animated Bach portrait, I’m dynamically scaling Bach’s face up and down!
Don’t worry though, for it is but another simple trick, mainly based on this function:
function dis(n)
 return (n-64)*fac+64
end
This function, (‘dis’, short for ‘displace’, because of course 8 letters is too long) will move any value towards the center of the screen (64;64) by the factor ‘fac’, a global variable.
With this function, the cut-out rendering snippet from above becomes this:
for y,xs in pairs(face_cutout) do
 local y=dis(y)
 local i=1
 while i<#xs do
  local xa,xb=dis(xs[i]),dis(xs[i+1])
  rectfill(xa,y,xb,y,15)
  i+=2
 end
end
Each line of our cutout is displaced towards the center of the screen, and so are the x coordinates that are stored in it.
For the sprites, we use sspr(sx, sy, sw, sh, dx, dy, dw, dh) to scale them and we displace them as well.
There is yet a little more to it than that, with the moving fill-patterns and the lighting effect mainly, but for those, you’ll have to dig into the source files yourself!
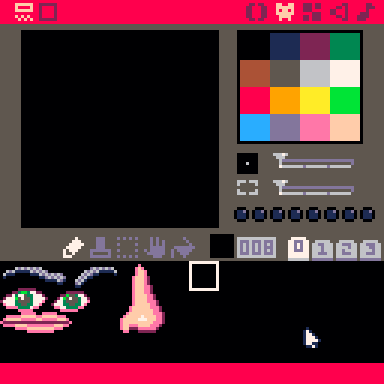
Here’s a silly bonus screenshot I took while working on this portrait!

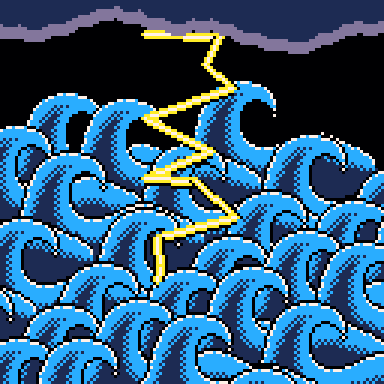
Today’s Bach Invention portrait features stormy seas, with lightning and angry clouds! And all these effects are super simple!
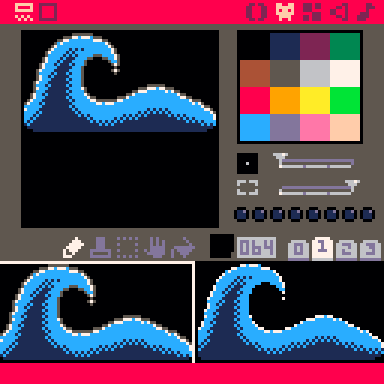
Let’s follow the draw order and start with the stormy seas! That’s somewhat obvious but it’s only one rather big sprite drawn again and again!
The dark-grey color is palette-swapped with black so as to create an outline of sorts.
We use cos() and sin() to move each 64×32 sprite on the screen. The angle used for these functions depends on the time, the original x coordinate of the sprite and the original y coordinate. It is defined like this:
local xx=flr(x/64)
local yy=flr(y/8)
local a=-t*3+yy/16+(xx+(yy%2)*0.5)/3
Draw a big dark-blue rectangle in the background to hide the gapsbetween the sprites and we have our wave effect!
Next comes the lighting effect! No more than a few lines drawn from randomized coordinates to randomized coordinates!
It goes like this:
-- x should be defined beforehand
local lx,ly=x,0
for y=0,96,8 do
 local nx=x+rnd(32)-16
 local ny=y+rnd(8)-4
 line(lx,ly,nx,ny,7)
 lx,ly=nx,ny
end
But that will only draw a random broken line on the screen, we need to make it thicker! For that, we just have to draw every line some few more times with incremental offsets, in yellow before drawing the white, and before that, in black on the sides. Here’s a still of what the final result looks like:
Finally come the clouds! There again, very simple stuff, we just draw a line of circles of varying heights and radius. Both depend on combinations of trigonometric functions used with an angle depending on the time and the x coordinate.
The line of circles is drawn twice, once slightly bigger and lighterwith the color 13 (indigo) and over that, slightly smaller and higher and darker with the color 1 (dark-blue), to make the cloud convincing!
And that’s pretty much it! I’m very happy with this one!
In today’s Bach portrait, I used a super cheap and satisfying effect that I shamelessly stole from Celeste! (the Pico-8 version) It’s the drifting snow/dust!
To be clear, I didn’t actually steal Celeste’s implementation, I didn’t even take a look at it (I couldn’t find it), I simply came up with my own implementation to reproduce this effect.
My point is: that floating dust makes anything beneath it look better and today I’m going to tell you about my implementation!
First off, we want dust particles pretty much all over the screen. So we will use two ‘for’ loops like this:
for y=0,7 do
 for x=0,7 do
  local x=x*16+rnd(16)
  local y=y*16+rnd(16)
 end
end
Note that declaring the local variables x and y only overrides the x and y from the loops for the scope in which they’ve been declared. In simpler terms, the local x and y exist only until the first ‘end’ encountered. You could just as well call these variables something else, I just think it’s cool we can do that in lua.
With this snippet of code, we have points that are all over the screen, but also scattered, randomly placed.
But this snippet will go into the _draw() function and rnd(16) will give different values for every frame… unless we call ‘srand(1)’ right before these loops! That will reset the “Random Number Generation” (RNG) with the “seed” 1 and make the subsequent ‘rnd()’ calls give out the same thing as the last time you called ‘srand(1)’!
If you want to come back to more random numbers afterwards, I would recommend using the line ‘srand(time())’ just after the code for the dust effect.
Now let’s make those dust particles move! We want them to move towards the right in an irregular way! Here’s what I’ve come up with!
local t=time()
srand(1)
for y=0,8 do
 for x=0,8 do
  local x=x*16+rnd(16)+t*30
  local y=y*16+rnd(16)

  local kt=rnd(1)
  x+=3*cos(t+kt)
  y+=3*sin(t+kt)*(sgn(rnd(2)-1))

  x=x%127

  pset(x,y,7)
 end
end
First, we add the time(*30) to the x coordinate of every particle, so that it moves towards the right.
Next, we add a circular motion to both x and y, using ‘cos()’ and ‘sin()’. We don’t want that circular motion to be synced up between all the particles, so instead of using the time as angle for these functions, we use the time + a random value, which will be the same for each particle every frame thanks to our ‘srand(1)’ call.
To make it look even more random and natural, we make it so there’s a chance that the motion added to the y coordinate is inversed. For this, we use this tiny bit of code: ‘*(sgn(rnd(2)-1))’, multiplying by the sign of a random number between 0 and 2, minus 1.
Finally, we use a modulo to make sure our x coordinate loops from the right side of the screen to the left.
We’re really close now!
All that’s left to do now is to make a few random particles bigger!For this, simply do a number comparison with a random number. For example, I used ‘if rnd(10)<2’. If that comparison is true, we use ‘rect(x,y,x+1,y+1,7)’. If it’s false, we only use ‘pset(x,y,7)’.
Once again, calling ‘srand(1)’ beforehand will make sure that we always get the same result for each particle.
And we’re done! Here’s the result and then the complete code:

local t=time()
srand(1)
for y=0,8 do
 for x=0,8 do
  local x=x*16+rnd(16)+t*30
  local y=y*16+rnd(16)

  local kt=rnd(1)
  x+=3*cos(t+kt)
  y+=3*sin(t+kt)*(sgn(rnd(2)-1))

  x=x%127

  if rnd(10)<2 then
   rect(x,y,x+1,y+1,7)
  else
   pset(x,y,7)
  end
 end
end
I’m very tired today so this is going to be a LIST of what you need to do to make those puffy procedurally-generated animated clouds happen! But first, a little introduction!
Today’s Bach portrait features procedurally-generated animated clouds! It’s another cheap-but-effective trick can be used to spice up any background sky!
The main idea rests on how Bob Ross paints clouds. Yes, seriously.When Bob Ross paints clouds, he first uses a darker paint and draws a vague puffy cloud shape, and then he uses a much lighter paint to cover the top of those cloud shapes. The lighter paint becomes the biggest part of the clouds and makes it look like the sun is shining above, while the darker paint shows only on the underside of the clouds, making it look like the clouds are blocking the sun.
And that is pretty much what we’re going to do as well!
- We’re initializing our clouds in the _init().
- Every cloud is a table storing x and y coordinates, and then data for a bunch of circles.
- Every circle is itself a table, with coordinates relative to those of the cloud, a radius, and then two random values rnda<1 and 1<rndb<4 which we will use later to animate the cloud.
- Store all the clouds in one ‘clouds’ table.
- Now we’re drawing the clouds in the _draw().
- First you should calculate where you want your clouds to be on the screen. If you just want them scrolling by, add the time() to it (*10) and do a modulo so that it loops from one side of the screen to the other. If you want parallax or make the positions relative to a camera system, just, uh, do your calculations now.
- Now you use ‘camera(-x,-y)’ to center on where you want your cloud to be on screen.
- For every circle in your cloud, do the next two steps:
- Add this to its y coordinate: circle.rndb * cos(circle.rnda + t()). (this step is optional – it’s for the animation)
- Then draw the circle with the color 13 (purple).
- Repeat steps 8, 9, 10 with y-1, radius-1 and the color 6 (light grey) and then again with y-2, raidus-2 and the color 7 (white).
- You’re all done!
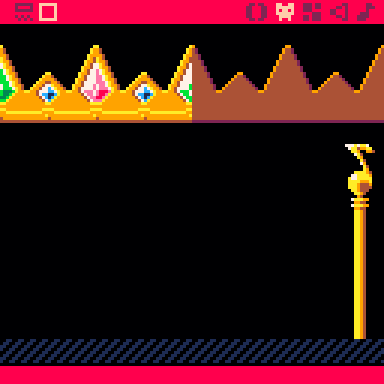
Today we’re looking at Bach’s rotating crown and how I implemented it!
First off, you need two crown sprites, one for the outside of the crown and one for the inside. I set them side by side, but you can put one under the other. (or anywhere else, but these positions are good because it’s easy to get from one to the other in terms of coordinates)
Let’s draw that crown now! First off, we use camera(-x,-y) to choose where the center of the crown will be on screen.
In this portrait, the crown takes up 40 pixels in width on-screen. (for no reason other than it seemed like the right size) So we’ll start with a ‘for’ loop with x going from 0 to 39.
For each value of x, we will draw a vertical slice of the inside of the crown, and then a vertical slice of the inside for the crown.The inside will be drawn higher and the inside lower, to give an impression of perspective.
But here comes the trouble. We’re getting to the point where we need to figure out the height offset for every slice of crown to make it look circular. And then we need to find which slice of the sprite to draw for each x value.
I scratched my head on this for longer than I’d care to admit when making this portrait and eventually fell back to keeping it super simple even if it meant it would be less convincing.
What I did is I used ‘x/40*0.5’ as angle for a sin() call that would give me the height offset for each new slice. And for finding the sprite slice, I went with the simplest solution possible: sx=(x/40*64+dt)%64. No trigonometry, we just take the x value, divide it by 40 (the width on-screen) and multiply it by 64 (the sprite’s width).
Before deciding to go with that, I fumbled with trigonometry for a long while to no avail. In the end, I figured that to do this properly, I would need an ‘arc cos’ function, which would give me the proper angle for both my height offset calculations and my sprite slice approximation. However this function is absent from the Pico-8 API.
Two hours ago, it occurred to me that the formula ‘cos(a)²+sin(a)²=1’could be used to make a custom acos() function. It’s too late now, but maybe I’ll get another occasion to try that out!
Anyway, here’s the final code!
local dt=t*30
camera(-x,-y)
for x=0,39 do
 local y=4.5*sin(x/40*0.5)
 local sx=(x/40*64+dt)%64  --outside of the crown
 local sxb=(x/40*64-dt)%64 --inside of the crown

 sspr(sxb+64,24,1,32,x,y)  --24 is the y coordinate of the
 sspr(sx,24,1,32,x,-y)     -- sprite in the sprite-sheet
end
Thank you for reading! I hope this was informative!

Excellent writeup, thanks – really informative and some great tips & tricks
LikeLiked by 1 person